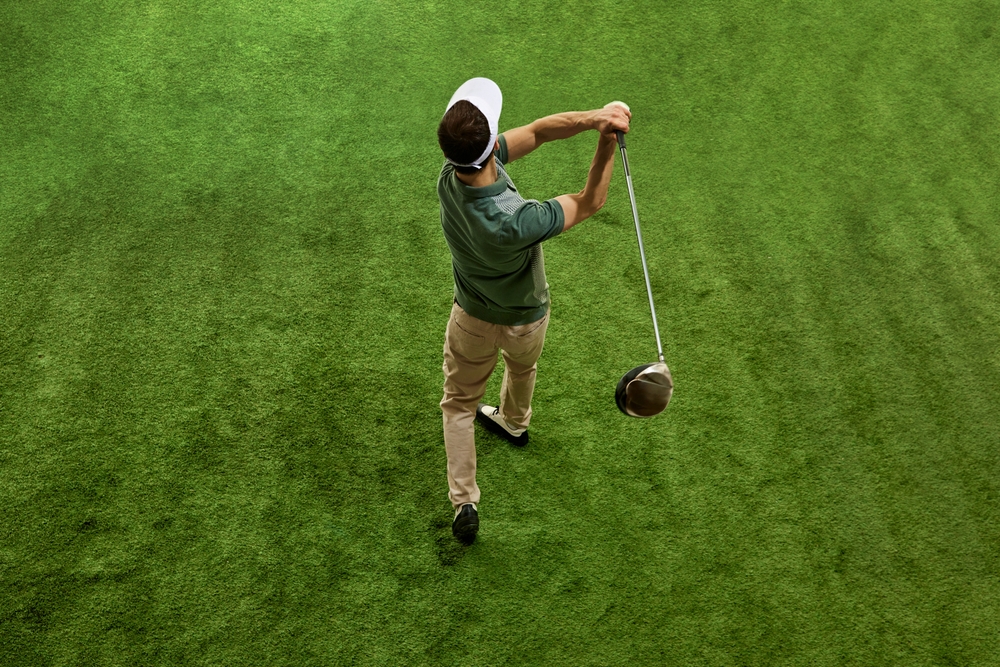
Transferring your weight during a golf swing means shifting pressure through the ground—not swaying your body—starting with 60% on your trail foot at the top of your backswing, then driving 75-80% onto your lead foot at impact while maintaining a stable center.
You accomplish this through proper lower body sequencing: pushing off your trail foot, rotating your hips first, and finishing balanced on your lead side with your trail heel lifted.
Keep reading to discover the five essential tips that will transform your weight transfer from guesswork into a repeatable, powerful motion.
Understanding Pressure Transfer vs. Traditional Weight Shift
Here's what separates modern golf instruction from outdated advice: pressure and weight are not the same thing.
Pressure refers to the ground force you generate through your feet—how hard you push into the turf.
Weight, on the other hand, is your actual center of mass, the physical location of your body in space.
Professional golfers primarily transfer pressure while keeping their center of mass relatively stable.
This distinction matters because chasing old-school advice about “shifting your weight” leads to excessive lateral movement.
You end up swaying back and forth instead of creating the coiled, athletic position that generates real power.
When you focus on pressure instead, you build leverage without losing your structure.
Your pressure distribution at setup:
- Start with roughly 50-50 balance between both feet
- Some instructors prefer 55% on your lead foot for a slightly forward bias
- Either approach works—choose what feels stable for you
During your backswing, shift about 60% of pressure to your trail foot.
Notice what's happening here: you're not sliding your body laterally.
Your center of mass stays put while you load pressure into your back foot.
This creates that coiled spring feeling without the two or three inches of sway that ruins consistency.
The downswing reverses everything with much more intensity.
You'll drive 70-80% of pressure onto your lead foot before you even reach impact.
At the finish position, you should have roughly 90% of pressure on your front side.
Research on skilled golfers reveals something remarkable: they achieve 142% of their body weight on the front foot at impact through ground force generation.
That's not a typo—the force exceeds their actual weight because they're pushing hard into the ground.
What you're building is a coiled position that rotates powerfully without excessive lateral sway.
Your body turns around a stable axis while your feet work the ground like pistons, creating force that translates into clubhead speed.
Executing Your Backswing Weight Movement
The proper backswing pressure shift should feel like you're moving “back and up toward the sky.”
That upward sensation is called unweighting, and it's what loads vertical force you'll unleash during the downswing.
Think of compressing a spring vertically rather than tilting it sideways.
Most amateur golfers do the opposite—they move down toward the ground during their backswing.
This kills power before you even start the downswing because you've already spent the vertical force you need.
If you feel yourself sinking or squatting going back, you're making this mistake.
Where to feel pressure on your trail foot:
The inside of your trail foot carries the load, never the outside edge.
This positioning gives you something to push against when you fire the downswing.
Picture a baseball pitcher on the mound—he loads pressure on the inside of his back foot against the rubber, then explodes forward with that leverage.
Your golf swing works the same way.
Here's what might surprise you: your body doesn't need to move laterally more than a couple of inches during this entire process.
The weight transfer happens primarily through rotation, not sliding.
Your hips turn, your shoulders coil, and pressure shifts through the ground—all while your head and center stay relatively quiet.
Your lead knee plays a supporting role by moving slightly inward toward your trail knee during the backswing.
This movement helps you load that trail side properly without swaying off the ball. It's a subtle shift, barely noticeable to someone watching, but you'll feel it when you do it right—your trail hip and leg feel loaded and ready to fire.
Initiating Your Downswing with Proper Lower Body Sequence
The downswing weight transfer must start with your lower body, never your arms.
This is non-negotiable. Your hands and club are the last things to arrive at the ball, not the first things to move from the top.
The transition move happens in two simultaneous actions:
- Push off your trail foot like you're jumping
- Drive your lead knee toward the target
These happen together, creating a slight squat position at the start of your downswing.
You're actually lowering into the ground momentarily before extending through impact.
This drop-and-drive motion is where power lives.
From there, your hips fire and rotate first. Your upper body follows—not at the same time, but after.
This sequence creates separation between your lower and upper body, which is where lag and speed come from.
When your hips clear while your arms are still dropping, you've created the space needed to attack the ball from inside the target line.
Here's why this sequencing prevents your arms from getting stuck: when your hips rotate first, they pull your torso and arms through naturally.
If you start with your arms or shoulders, your lower body can't catch up, and you're trapped with nowhere to release the club.
The checkpoint comes early.
When your hands reach belt height in the downswing, you should already have more weight on your front foot than your back. If you don't, your sequence is wrong.
What's actually pulling that weight forward is your lead heel driving into the ground.
This creates leverage that literally yanks pressure from your trail side to your lead side.
Your lead leg then extends (but doesn't lock) through impact, generating ground force that translates directly into clubhead speed.
The harder you can push into the ground with that lead leg, the more power you'll generate—it's pure physics.
Achieving the Correct Impact Position

At impact, 75-80% of your weight should be planted on your lead foot.
This isn't a suggestion—it's where the physics of solid contact demand you be.
Your trail heel will be lifting off the ground at this point, sometimes barely touching, sometimes completely airborne depending on your flexibility and swing style.
Your hips tell the story of proper sequencing.
Both should have cleared toward the target, with your lead hip sitting higher than it was at address.
This elevation happens because you've extended through the ball, not because you've stood up and lost your angles.
What your lead leg is doing:
Your lead leg straightens through impact but never locks.
Think of it as creating a stable post to hit against—firm enough to support the force you're generating, but athletic enough to maintain balance.
A locked knee means you've extended too early or too aggressively.
The position of your lead shoulder and lead hip determines where the club bottoms out.
Both must be ahead of the ball at impact to ensure your low point occurs after contact, not before.
When these landmarks are behind the ball, you'll hit fat shots or flip the club trying to compensate.
One angle you cannot lose: your spine tilt away from the target that you established at setup.
This tilt should still be there at impact.
Many golfers ruin their weight transfer by standing up through the ball, which pulls their spine vertical and sends their low point backward.
Keep that address tilt, and your weight transfer will work in harmony with solid contact.
Recognizing and Avoiding Critical Weight Transfer Mistakes
Three errors destroy weight transfer for most amateur golfers: hanging back, swaying, and reverse pivot.
Each one kills power and consistency in different ways, but they all share a common thread—fear of proper downswing mechanics.
Hanging back means keeping weight on your trail foot through impact and beyond.
When you do this, you're hitting up on the ball with irons (which need a downward strike) and making contact behind the ball.
The club bottoms out too early because your low point never shifts forward.
You'll finish with weight still on your back foot and often lose balance backward after the shot.
Swaying is excessive lateral movement—your body sliding back and forth instead of rotating around a stable center.
This looks like distance gained but actually costs you consistency and power.
Your back shoulder moves several inches laterally instead of turning, and your trail foot stays flat at the finish instead of lifting onto the toe.
The reverse pivot flips everything backwards:
- Weight moves away from the target during the downswing
- You end up on your trail side at impact when you should be on your lead side
- The exact opposite of what should happen
Here's your diagnostic checkpoint at the finish: your trail foot should be up on its toe with minimal weight, and you should be balanced comfortably on your lead foot. If your trail foot remains flat or you can't hold your finish position for several seconds, something went wrong earlier in the swing.
Signs you're swaying:
- Trail foot stays planted flat at finish
- Back shoulder travels more than a couple inches laterally during backswing
- You feel unstable or off-balance through the swing
Signs you're hanging back:
- Weight still on trail foot at finish
- Hitting the ground before the ball consistently
- Losing balance backward after contact
- Scooping motion with your hands trying to lift the ball
The root cause of all three errors? You're trying to “help” the ball into the air instead of trusting the club's loft.
When you fear hitting down on the ball, you subconsciously hold back, sway to stay behind it, or reverse pivot to scoop it up.
Trust the loft. Get your weight forward. Let the club do its job.
Five Essential Drills to Practice Weight Transfer
These drills ingrain proper weight transfer through muscle memory.
Practice them separately first, then integrate the feelings into your full swing.
1. Step Drill
Start with your feet together at address. As you begin your downswing, step toward the target with your lead foot.
This exaggerated motion teaches you the natural stepping pattern that happens in every athletic movement—throwing, hitting, swinging.
You'll feel how your weight naturally flows from back foot to front foot when you allow it to.
Once the feeling clicks, gradually narrow your stance until you're back to your normal setup width.
2. Foam Roller Drill
Place half a foam roller under your trail foot during practice swings.
The elevated, unstable surface forces you to push off properly or you'll lose balance.
You'll immediately feel whether you're loading the inside of that trail foot correctly in the backswing and generating real push-off force in the transition.
This drill makes the leverage concept tangible instead of theoretical.
3. Toe Tap Test
Hit balls normally, but immediately after impact, tap your trail toe on the ground.
If you can do this smoothly without stumbling or losing balance, your weight transfer is correct.
If you can't—if you're stuck on that back foot or wobbling—you know exactly where the problem lives.
This gives you instant feedback on every swing.
4. Tennis Ball Drill
Position one tennis ball under the big toe of your trail foot and another under your lead foot.
Make swings feeling pressure against the trail ball during your backswing, then drive pressure hard into the lead ball through impact.
The balls give you a physical target to push against, turning abstract pressure concepts into something your feet can actually feel and respond to.
5. Medicine Ball Throw
Hold a medicine ball and simulate your swing motion, releasing it at the “impact” position.
The natural weight shift you need to throw the ball with any distance perfectly mimics proper golf swing transfer.
You can't throw powerfully while hanging back or swaying—your body instinctively knows to push off the back foot and drive forward.
This drill connects golf mechanics to movement patterns your body already understands.
The biomechanical truth these drills reveal: weight transfer isn't about massive lateral movement.
It's about efficient pressure application through the ground, proper sequencing from lower body to upper body, and maintaining a stable center while rotating powerfully through the ball.
When you get it right, it feels athletic, not mechanical.
Conclusion
Proper weight transfer comes down to shifting pressure through the ground, not sliding your body around.
Start by focusing on the lower body sequence—push off that trail foot, drive your lead knee forward, and let your hips rotate before your arms catch up.
Practice these five drills consistently, and you'll replace compensations with the athletic movement pattern that creates both power and consistency.


